All maps have their own sniping spots even for small maps such as Checkmate or Garrison. Sniping spots are more common for game modes like Domination as it reduces the frequency of flanks that could come from behind since your team will be spawning consistently behind you.
These are the best sniping spots in Checkmate in Call of Duty Black Ops Cold War. Keep in mind to always have the Ghost perk up when using snipers as it is extremely valuable for concealment from Spy Planes. A suppressor alone is not good enough to keep you covered.
Sniping Spot 1
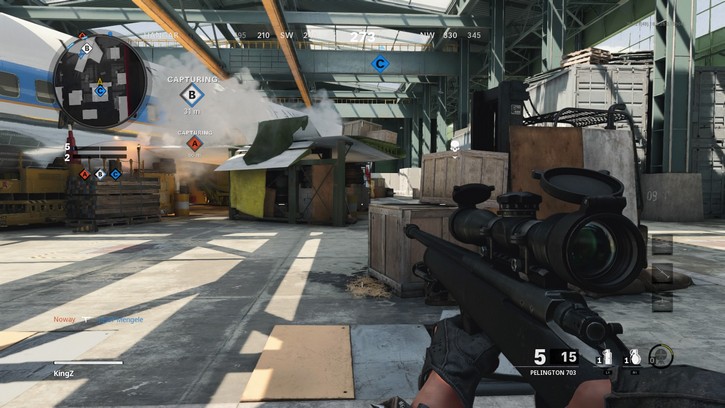
The first sniping spot will be just in front of flag A. You will have 3 short angles to look at from this side. You will be able to see enemies flanking which is quite popular in Checkmate. Enemies usually go around the plane instead of heading forward if they want to succeed in taking flag B.
The gunfight for flag B will take forever if everyone just keeps camping spots near their spawn point. Someone will need to flank and pincer them to take over. Another reason would be to cut off reinforcements.
This sniping spot will stop almost all flanks coming from the right side if you spawn at flag A. You can also keep track of enemies trying to sneak in for a tri-cap if they choose to head straight for your team’s spawn location.
Being extremely fast with your sniper will be important here as there are two angles that you are going to cover that are quite near to you. You have one big cover and make use of it if you miss your shot. The best sniper for this sniping spot will be the one that can do quickscopes.
Sniping Spot 2
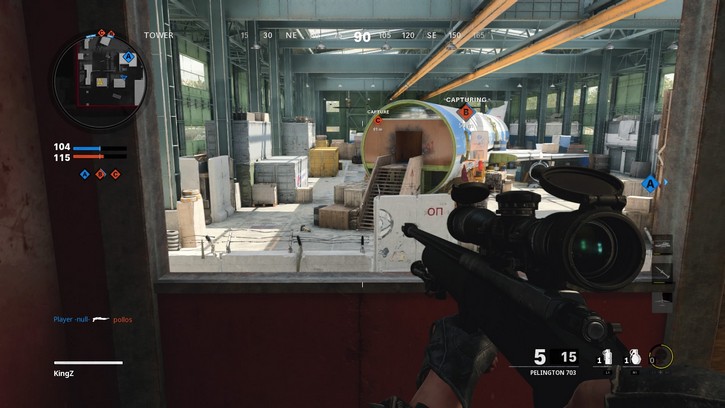
Sniping spot 2 is all about supporting your team capturing flag B if you spawn on flag A. There is minimal flexibility here since you need to go up a ladder to a cargo for this sniping spot. You get more coverage but you will not be able to support flag A or flag B if the enemies are about to take them already.
Whereas in the first sniping spot, you can easily run towards flag A or flag B if they need help contesting so that your team does not lose the flag and keep it contested. This sniping spot will cover both the left and right side flanks and you can basically make flanks from the enemy team impossible as long as you hit your shots.
Make sure you are near the drop point when shooting because if they throw a grenade at you, you can easily jump down to avoid it and climb back up again.
Sniping Spot 3
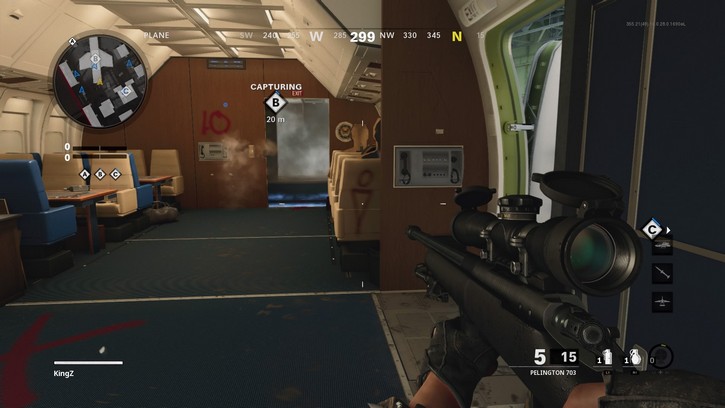
The third sniping spot is the strongest position I got to play around with. If you spawn at flag C, this portion of the plane will be your side of flag B. This is one of the reasons why spawning near C is heavily favored in Checkmate. Your teammates can clog enemies into the middle by holding the flag B from the little room with cover by jumping on the table on the left.
The enemies will have to throw C4s or frag grenades but with jammers and trophy systems, it will be extremely hard for the enemy to take over without showing themselves to you. This sniping spot will use that little cover from the plane’s ladder entrance on the right.
You will catch every single enemy coming for your team holding flag B. The only thing that can make this hard for you is if the enemy decides to use smoke grenades. You can still fight with thermal optics or if not, you can easily spam through it as the path is narrow. Have the door position memorized so you know where to fire or even pre-fire.
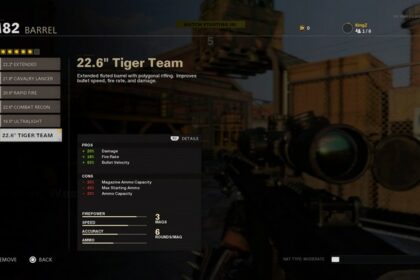
You can also hit the wooden wall as your sniper will have enough firepower for bullet penetration. Make sure you have that on your loadout. It is the barrel attachment with the word Tiger Team in it.
Conclusion
There are more sniping spots, like the one on the right side of flag C, but after playing for tons of hours leveling up sniper rifles, there is not much traffic going around there for you to see enemies consistently. If you are extremely good at quickscoping, you can find more sniping spots near the objectives as long as you find cover surrounding the plane. Even the spot below the plane or flag B is extremely powerful to hold.

